Saturday 5 November 2011

Lanky kids tutorial!

No, I'm not going to tell you how to make a tall child - your folks should have done that a while ago ha ha!
I'm going to show you how to lengthen a pair of kids jeans by adding a contrast panel - works a treat on my boy's trousers! He's tall and skinny, and is at least a year size smaller in the waist than he is in height, and his trousers either fall down round the waist and fit him in the leg, or fit him in the waist and look like 3/4 lengths - fine in the summer, not so good now winter's on the way!

So here goes....
First, get a couple of pairs of trousers, preferably different shades or colours so the panel contrasts. 
Then, around the knee, draw a line across the pants that you want to add the panel to. 

and cut along the line!

Lay the two pieces on top of the other pair of jeans, and measure how much you need to add in to get the right length.

and cut a panel from each leg to the size you need.

Then you just need to stitch them together! Turn the contrast panel inside out, and slide it over the bottom of the top of the jeans (does that make sense? lol!), pin, and stitch. You can also top stitch at the stage, but I didn't on these as I didn't have a red thread to match the topstiching on the rest of the jeans. 

Then do the same with the bottoms of the jeans, turn right side out, and press! 

Eh voila - pants that fit! Both ways!


Thanks for looking!

Lisa
xxx


Friday 4 November 2011

Sewing for Boys!

I ordered my copy the other day from Amazon, and it arrived yesterday! I can't wait to get sewing from it, there's some gorgeous things in there for Jamie, from trousers and jackets to hats and brick bags!
I'm also going to be taking part in the Boy, Oh Boy, Oh Boy! Sewing for Boys sew-a-long (wow, that's a lot of boys in that sentence lol!) that starts at the beginning of January - you'll see the button over there on the right, under 'My Inspiration' >>>>

I'm an impatient sort, though, so you might see a few projects rolled out before then....ha ha!

Thanks for looking!

Lisa 
xxx

Thursday 27 October 2011

Union Jack (Flag!) Stool redo

I've been looking at this stool for a while now...
Poor thing. it sits in our living room, being sat on by Mr. B while he writes his music, looking all forlorn with its 'I'm a reject from a 70's alpine ski lodge' polar fleece cover, that has twisted over time so it's not even straight lol!

So I decided it was time for a change. 

Now, if you follow my blog, you may remember having seen these pictures
and the Union Jack cushion covers... (on the left of this pic - we have 2 of them!)

so I thought I'd go with the Union Flag theme (did you know it's only supposed to be called a Union Jack if it's flying off a ship? I'm a fund of useless information lol!) after seeing this one made by Catherine at OriginalStitch. Awesome, huh?
I picked my fabric, and winging it as is usually my way, I set to work! I decided on a 'shabby chic' type look, with loose threads, uneven stitching etc as that's what I like! it's not just because I'm really bad....ha ha ha! 


 and here's the finished item....I love it! 
Now, what else can I Union flag-ify.......?????

Thanks for looking!
Lisa
xxx

Sunday 16 October 2011

Design by Jamie!

I made this Imke before we went away...I've only just got round to posting it! 
Now, the story behind this one...I was looking on EBay for some fabric for Jamie to make him a fleece hoody, and found some gorgeous 'kid' fabrics - robots, cars, trains, bright colours...
I saved them in my watch list, and decided to let him pick.
So, he looked....and picked a plain, dark brown stretch corduroy that had been in my watch list for another project! lol! No amount of persuasion would get him to change his mind...so I ordered it!
When it arrived, I decided to let him go the whole way and choose everything...the style, the applique wording and fabric - even down to the colours of thread!
So this is what he came up with...I think the boy has some serious designing in his future, it looks great - definitely not bad for a soon-to-be-4 year old!

The orange and blue zig zag stitching...they had to be on top of each other, not side by side...
The pocket on the sleeve...
The 'DUDE' applique...
and a couple of pics of the finished item!


Thanks for looking! 
Lisa xxx

Wednesday 21 September 2011

Of camera bags and hoodies.....

This week, I FINALLY finished the camera bag I've been working on for MONTHS. Literally.
The first draft can be seen here...and this one is a LONG way from that! There's been drawings, and calculations, and yes, I'll admit it - some swearing lol!
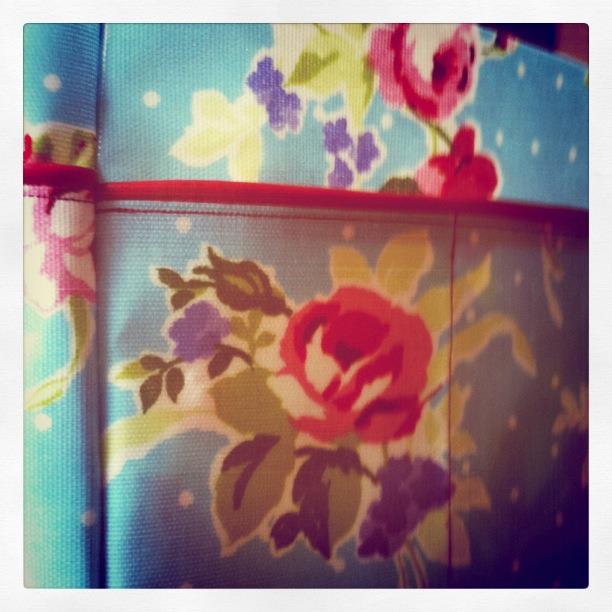
But it's finally done. It's by no means perfect, being only the second thing I've ever sewn with oilcloth (steep learning curve isn't the half of it lol!), but I love it, and as it's for me, that's all that matters. I was so close to giving up on it and throwing it in the bin a few times, and I'm so glad I didn't! I finally have a bag I can get ALL my stuff in - my lenses, macro tubes, filters, manual (ha ha!) and of course my camera!
So here it is. Blood, Sweat and Tears.....but I did it.


I've also made my first girly Imke this week....not quite as exciting as the camera bag, but I love it and I'm really pleased with how it came together. It's made from fleece, with an applique that I upcycled from a girls RTW tshirt, and binding made from an old adult tshirt of mine that matched the colour perfectly!
I also added a long custom 'curly' hood with a pom pom.
Please excuse the 'model'......poor boy ha ha!


 So there you have it. Not much sewing, I grant you, but I'm happy!

Thanks for looking
Lisa
xxx

Thursday 15 September 2011

Oddly shaped balls.....

Well, if you're a rugby fan, like me, you can not have failed to notice that the Rugby World Cup is under way in New Zealand!
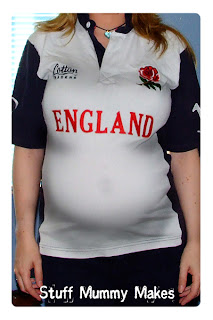
Now this is very exciting for me...I've been a fan since I don't know when, and now my little dude is getting into it too, which makes me a very happy Mummy indeed! It's not surprising though, really - last World Cup, he was in here - I gave birth one month and one day after this was taken ha ha! 

 He's been walking round the flat ordering 'Crouch! Touch! Pause! ENGAGE!', and was shouting 'Come ON England!' and 'Go Johnny!' - he makes me very proud lol!
So yesterday morning, I decided he needed an England shirt of his own.  
So I found a picture of the England Rose (not hard - it's my wallpaper on my pc!), and traced it onto paper with pencil. I made sure I did the lines quite dark, as I then turned it upside down onto the back of some fusible interfacing, and using the schoolkids trick, rubbed all over the back with the end of a pencil so the design was transferred to the back of the interfacing. This way, the applique pieces would form the image the right way round.
I then cut them all out, and then ironed them onto the jersey scraps, and cut them out. Then Istuck them onto the shirt with washable glue stick to hold them in place - there were too many pieces that pins weren't practical.
Please excuse this photo as it was taken with my phone cam lol! You can see the traced image on the left..this is all the pieces glued onto the shirt.
Then the last thing to do was to stitch them on....I handstitched it all as I think it would have been too fiddly for my machine skills!

And here's the little guy in his new shirt....he seems to like it!
Thanks for looking...and 
COME ON ENGLAND!!!!
Lisa
xxxx

Wednesday 7 September 2011

Impulse sewing....

I really do love my Sewing Clothes Kids Love book.
I got up this morning, and wanted to sew something, so out it came, and I decided on the Avalon Jacket.
Now, you all know I don't have a girl to sew for, but I see it as all good practice on sewing techniques and pattern construction...I love the way all those random looking pieces of fabric suddenly all come together and become something!
So, another day of sewing for sewing's sake...and why not? 
I used decor weight fabrics, and they seem to work really well for a jacket...and the ribbon on the back actually matches a lot better than it looks in the photo lol!
So here it is!

Front...
 Back...
 And a quick shot of the ribbon detail!
Thanks for looking, and happy sewing, if sewing is what you're doing!
Lisa
xxx

Saturday 3 September 2011

I don't normally blog competitions....

but I really want to win one of these amazing Kidzsacks from The Little Green Paintbox...amazing eco-friendly and child friendly products from right here in the UK! 

(image from Little Green Paint Box)
If you'd like to enter to win it too, just visit PoppySparkles blog and find out how! 
(Or don't...then I stand more chance lol!)

Thanks for looking, and good luck if you enter!
Lisa
xxx

Thursday 1 September 2011

Superman, Custom Feliz, and a sneaky peek!

Hi all!
Thought I'd show you my latest creations....
Russ had this tshirt for ages, and loved it, but it got a little tight for him lol! So I rescued it from the trash, and turned it into a shirt for Jamie.
Jamie decided he needed to do some of his 'posing' shots.....

Then I made this Feliz today...it's a little different to the usual style I make. It has no overdress, no frills, but it does have the sash ties still, with grosgrain ribbon straps and a giant applique flower. I love the way this turned out!

and finally....a sneaky peek at the oilcloth camera bag I'm working on...it's going ok so far lol!

Thanks for looking!
Lisa
xxx

Friday 26 August 2011

Stuff Jamie Makes . . . (and a very simple tutorial!)

I don't always remember to post (or photograph) the little projects that me and Jamie come up with to keep him entertained, and I'm pretty sure that some (most!) of them you wouldn't want to read about ha ha!
But it was raining bucketfuls today, he was bored, and so I came up with this!
It's really very easy, very fun, and you can eat the leftovers. No, really, you can! 

You will need...

a piece of card (not too thick - you need to be able to put holes in it!)
the largest needle you can find (ours was a very big, very blunt darning type)
some thinnish ribbon (you need to be able to thread it through the needle)
some Cheerios (Note: other ring-shaped cereals are available.)

Ok. Got all that? Good. 

Firstly, draw a simple shape on your card. I wanted a heart - Jamie, being a boy and finding hearts 'too girly, Mummy!' chose a triangle.
Now, all around your shape, poke holes through the card at 1cm intervals.
Then thread your needle with the ribbon, put a knot at the end, and start sewing...
needle up through the hole from the back, add a Cheerio, down through the next hole, up through the third, add a Cheerio, and so on. It looks pretty cool when you're finished, it's simple enough for a young (ish) child to do (mine's nearly 4) and they get a great sense of achievement when it's finished!
Here's some photos of our project this morning...
Let's get started...
I'm getting the hang of this now, Mummy...
FINISHED! (I think I'll just eat these Cheerios that were left over nom nom nom!)
Thanks for looking, hope you have fun with this!
Lisa
xxx

Thursday 25 August 2011

A catch up . . .

With everything that's been going on, I haven't really felt much like posting here....so I suppose I should catch up on everything I've made since the last time I posted. (Don't worry, there's not tonnes...I haven't felt much like sewing, either!)

Firstly, a Feliz dress I sewed for my friend's little girl to wear to a wedding...

Then yesterday I made some self-drafted camera strap covers...these are all for sale on my Stuff Mummy Makes Facebook Page...


and finally, a self drafted oilcloth shopper that I made today! I'm seriously in love with this bag....and as it looks like I've sold this one already, I might just have to make another one for myself lol! 


This was my first time working with oilcloth, and I love it! It was also my first time making an elasticated pocket, so yay!

And that's it! (See, I told you it wasn't loads lol!)

Thanks for looking

Lisa
xxx

Getting an early start...

Well for some reason, (and trust me, this NEVER happens!), I'm making an early start on things for that most dreaded of C-words... CHRI...